This post may contain affiliate links. Please read my disclosure policy for more info.
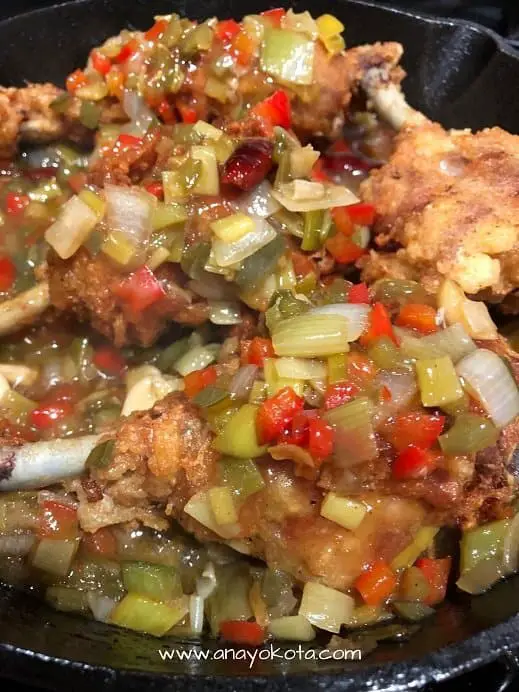
Kkanpunggi is a mouthwatering combination of sweet and spicy flavors smothering crispy fried chicken. Infused with garlic, this is a must try recipe!
Kkanpunggi is sautéed with diced vegetables, spicy chili oil, and mouth watering fried chicken, which is a super popular Korean-Chinese fried chicken recipe. Let’s get started.
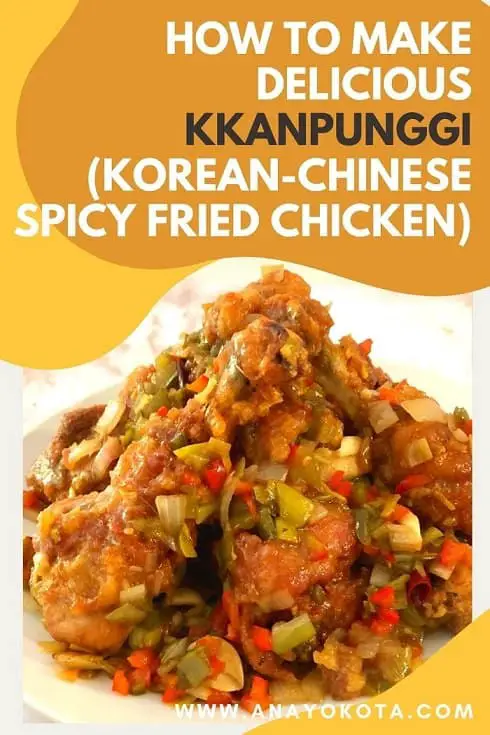
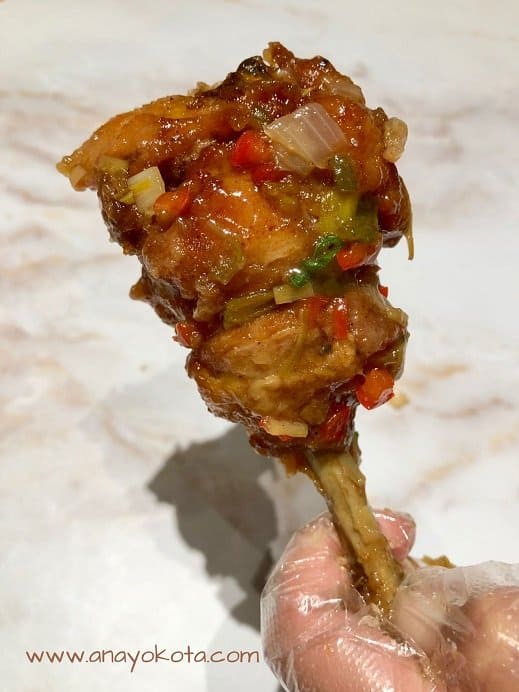
My first experience of this Chinese-Korean fusion dish was as a child. Every time my family would go out to our favorite Chinese inspired Korean noodle house, we would always order their lip smacking, finger licking good, spicy garlic chicken drumsticks.
Due to faster cooking time, the more common kkanpunggi sauce recipe uses boneless chicken. However, since my favorite way is to eat it on the bone, I wanted to replicate my childhood experience and bring this kkanpunggi recipe back to life.
Fortunately, since the pandemic started, I had a lot more time on my hands and wanted to brush up on my fusion recipes. It took me a few days, but I finally found the ratio and recipe that works best for me to make my version of Korean soy garlic fried chicken recipe. I typically prefer my savory dishes with less sodium and my sweet dishes with less sugar. Hence, this recipe can be eaten on its own or with a refreshing side of Korean daikon radish.
What did you cook during the pandemic? Perhaps you would like to take this Korean garlic chicken recipe.
As a side note: You can always use boneless chicken as it will cut prep time significantly. Additionally, I modified this chicken hot garlic recipe to incorporate more veggies, but you can always use less. The most important part of this kkanpunggi recipe is its sweet and spicy glaze.
HOW TO PRONOUNCE KKANPUNGGI
The syllables are separated as follows: Kkan – pung – gi.
kkanpunggi pronunciation:
Kkan is pronounced /Gahn/ with a hard “G” sound but not as strong as a “K” sound
Pung is pronounced /poong/Gi is pronounced /gi/ with a soft “g” sound
HISTORY OF KKANPUNGGI CHINESE CUISINE
To clarify: There are several variations of creating Korea’s dakgangjeong (soy garlic fried chicken) recipe. The version that I am specifically focusing on is the Chinese influenced dish. I would say that the closest recipe to this Chinese crispy chilli chicken is similar to General Tso’s Chicken as kkanpunggi is glazed with a sweet and sour sauce.
It’s hard to say exactly where and when kkanpunggi was first created. However, it is common belief that kkanpunggi, which was inspired by the Chinese version of spicy garlic chicken, was modified to suit Korea’s palette.
As Korean style Chinese noodle houses began to boom, more and more restaurants started to provide various versions of kkanpunggi using fried beef, chicken, shrimp, or tofu. It became such a phenomenon that many restaurants in Korea began to offer deliveries along with many other Chinese inspired dishes such as Jjampong, Jjajangmyeon, tangsuyuk and much more.
As Chinese and Koreans immigrated, it wasn’t long until the United States began to experience this delicious trend.
HOW TO MAKE KKANPUNGGI
Kkanpunggi is a beginner to intermediate level dish as it requires several steps from marinating the meat to frying, to glazing over a hot skillet. Though there are many little steps (18 to be exact), through my pro-tips and detailed instructions, I am confident that with a little patience it will be well worth it.
Also, this is completely optional, but when I went to my local Korean style Chinese noodle house, they would prepare the drumettes so that the bone would be nicely shaved down so that all the meat would be gathered at the top. Looks like a lollipop if you ask me.
Whether you get bone-in or boneless, the key to a good Korean garlic fried chicken recipe is clean oil and quality ingredients. I recommend using any flavorless high heat oil such as palm, sunflower, grapeseed, or even safflower oil.
PRO-TIPS
- Marinate. Though many traditional Chinese kkanpunggi recipes do not require marinating the meat, I found that (depending on the cut of meat), marinating helps tenderize and flavor the meat. For a quick marinade, do not skimp out on salt especially if you are using bone-in chicken. As much as I don’t like my food to be too salty, there is a difference between bland and flavorful.
- Drumettes. In my recipe, I used drumsticks. However, if you would like to cut down the cook time but still use a bone in chicken, go for the wings – specifically the drumettes.
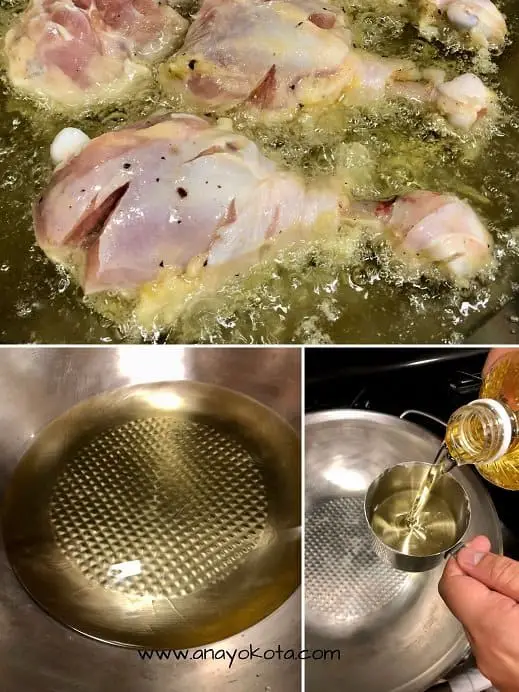
- Double Fry. Or even triple fry. The reason why many fried chicken recipes require double frying is because it allows the chicken to develop that extra crispy crunchy skin. Frying once will allow the inside of the chicken to release steam, eventually making the skin soggy. To avoid soggy skin, wait about 5-10 minutes and then fry a second time. This will ensure that the steam will not make the outer layer of the chicken soggy. The last step in creating stir fried garlic chicken, is smothering everything in the spicy sauce. Hence, to truly ensure crispy chicken double flying is essential.
STEP BY STEP CHICKEN KKANPUNGGI RECIPE (Korean-Chinese Spicy Fried Chicken)
Cuisine: KoreanDifficulty: easy, medium4
45
minutes35
minutesIngredients
- Marinade Ingredients
3 lbs (1360 g) – drumsticks
¼ cup (60 ml) – soju
2 tsp (3.52 g) – ginger
2 tsp (11.38) – salt
1 tsp (2.33 g) – ground black pepper
- Batter & Frying Ingredients
1 ½ cup (240 g) – potato starch (potato flour)
1 egg
½ cup (118 ml) – water
3 cups (750 ml) – high heat cooking oil (ie: safflower oil, sunflower oil, palm oil, vegetable oil, etc…)
- Vegetable Ingredients
¼ cup (60 ml) – high heat oil (ie: safflower oil, sunflower oil, palm oil, etc…)
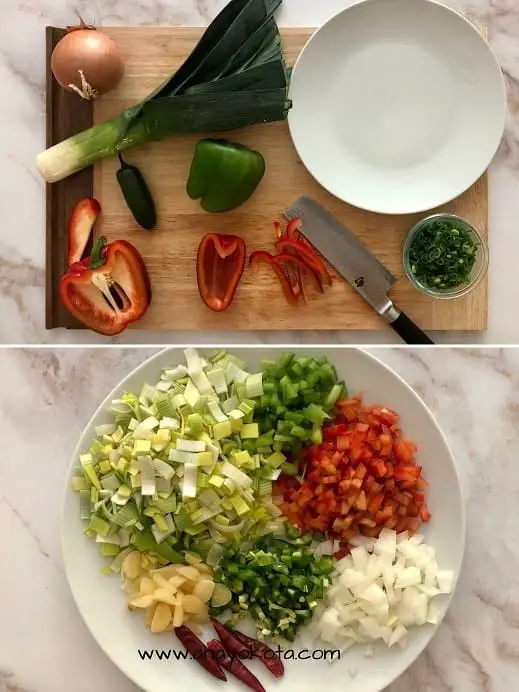
½ cup (85 g) – chopped red bell pepper
¼ cup (44 g) – chopped green bell pepper
1 ½ cup (132 g) – chopped leeks (just the white part, don’t eat the green part)
¼ cup (55 g) – chopped onion
1 pepper (30 g) – chopped jalapeno (omit jalapeno if you would like this recipe mild)
7 cloves (20 g) – cloves of garlic sliced
4 peppers (2 g) – dried red chili pepper cut in half
- Sauce Ingredients
1 tbsp (15 ml) – dark soy sauce
2 tbsp (30 ml) – rice vinegar
5 tbsp (75 ml) – water
1 tbsp (15 ml) – oyster sauce (you can substitute for soy sauce but use less because it’s a bit saltier)
½ tsp (3.6 g) – ground white pepper (you can substitute for ground black pepper. I simply like the peppery bite of white pepper)
1 tbsp (20.50 g) – oligosaccharide (if you can’t find oligosaccharide, you can substitute for corn syrup)
1 tsp (3.33 g) – potato flour/starch (you can substitute for cornstarch)
- Optional Garnish
Thinly sliced green onion
Toasted sesame seeds
Directions
- Marinade Instructions
- Optional. Shave the bottom of each drumstick so that all the meat is gathered at the top.
- Score each drumstick so that the marinade will seep in as well as allow for faster cook time.
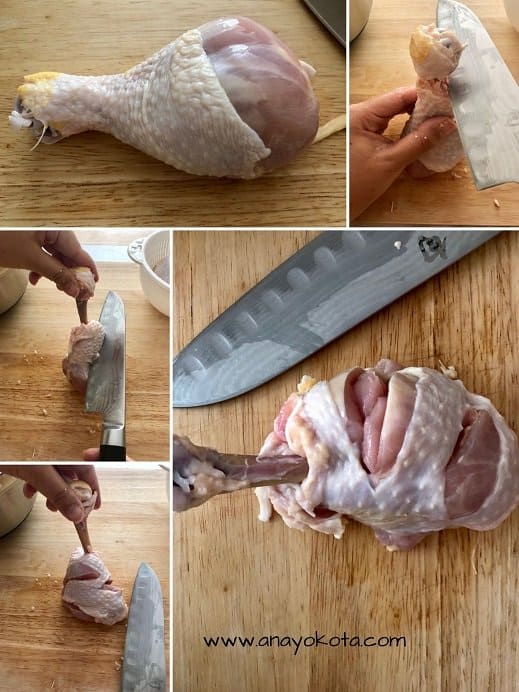
- Add all the marinade ingredients in a large mixing bowl and mix until each drumstick is nicely coated.

- Cover with clear plastic wrap and store in the fridge for at least 30 minutes (up to 2 hours).
- Once the chicken has been marinated, mix in 1 ½ cup potato flour, egg, and ½ cup of water.

- Frying Instructions
- In a deep wok or frying pot, pour the oil over high heat until the oil reaches about 350 Fahrenheit (176 Celsius). You can test the heat by adding a little bit of batter into the oil. If it bubbles, the oil is ready.
- Fry the chicken in the oil for about 10-12 minutes. If you have a shallow wok, make sure you flip the chicken for even cooking.
- Take the drumsticks out of the oil and let it dry on a drying (cooling) rack or a large plate lined with a paper towel.
- Wait about 5-10 minutes.
- Fry the chicken a second time for another 8-10 minutes or until the thickest part of the chicken reaches 165 Fahrenheit (73 Celsius).

- Take the drumsticks out of the oil and let it dry on a drying (cooling) rack or a large plate lined with a paper towel.
- Vegetable and Sauce Instructions
- Pour all the sauce ingredients in one bowl and gently whisk together. (you can do this ahead of time to help save time)
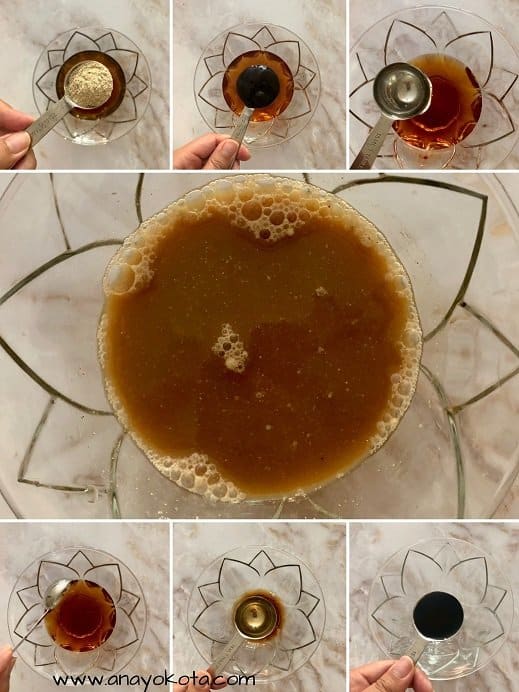
- In a large skillet over medium high heat, pour ¼ cup of oil.
- Stir in the red and green bell peppers and onions until onions are slightly translucent.
- Sauté the leeks, jalapenos, dried chili, and sliced garlic until soft and tender. This will also infuse the oil giving it tons of flavor.

- Slowly pour in the sauce ingredients and stir for about 2 minutes.
- Add the fried chicken and gently toss until each drumstick is nicely glazed (no more than 30 seconds).
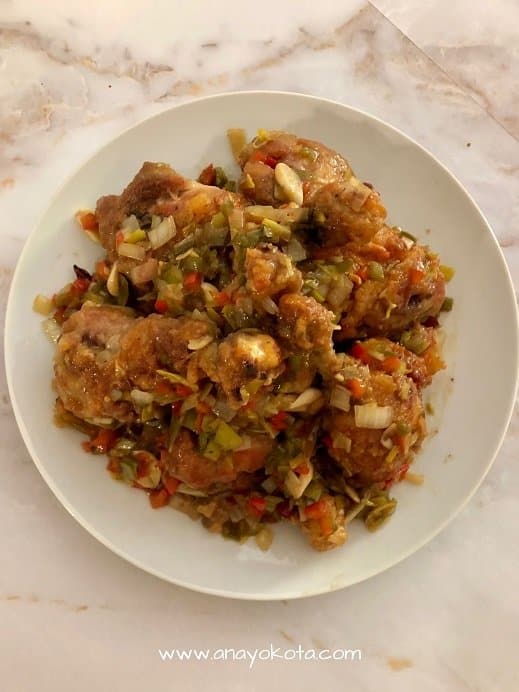
- Plate and serve!
Notes
- Korean food is notoriously known for the range and flexibility for how much of each ingredient you want to use. As mentioned earlier, you can always add more or less of an ingredient to match your preferences. This specific recipe is slightly modified so that it is less salty than the average Kkanpunggi chicken recipe because I prefer things less salty.
All these steps for the Korean chilli chicken recipe may seem really intense. But as you can see, my instructions are very detailed and I try to explain as much as possible to help even a beginner fryer to enjoy this recipe. Before you know it you will be a pro at making this easy spicy fried chicken recipe!
Please let me know if you try this recipe or use just the Korean garlic sauce for other meats in the comment section below and if you would like to see other Korean fried chicken recipes.
To learn more about Korean culture at the table such as why it is so important to never stick your chopsticks vertically in a rice bowl, read my full proof article on Korean table manners.


